Wednesday, August 3, 2011

what I did on my summer vacation

This is a very picture-heavy post, in case you hadn't noticed already. Which is actually kind of a pain in the butt to put together, since Blogger doesn't have a good way to handle mass uploading of photos. It can only handle five at a time, individually chosen, and all five have to have the same alignment (left/center/right) and that alignment cannot be changed after they've been uploaded. It's really quite annoying, although to be fair it is a free service so I suppose I can't complain too much.

Anyway, on with the pictures! The last week of June and first week of July were spent with our friends from New Jersey, including a week on the Olympic Peninsula. We had a really great time and got to visit a lot of neat stuff that we hadn't yet seen despite living here for ten years now.

The Hoh Rain Forest was very impressive, even for just the small hikes we enjoyed around the ranger station. The trees are enormous, as can be seen from this fallen tree that is several hundred feet long with the trail built right next to it. The park has done a great job with informational signs about nurse logs and how the trees grow, and it was very neat to see the differences between the trees as they grew.

Told you there were some big trees!

Our next excursion was to Cape Flattery, which is the most northwestern point in the continental United States. It's a very long and windy drive to get there, with the roads not in the best condition, so I am rather glad we did not ride our motorcycles out there in May like we had originally considered. The Cape itself is on tribal land, and there is a very nice but steep hike from the parking lot down to the edge of the cliff with several lookouts built into the land. The colors of the water as the tide rolled in and out were just amazing...teals, greens, blues, whites, all on the moss green and stone gray of the rocks. Beautiful!

More lovely water colors, swirling in the tide.

Since this was tribal land and not a state park, dogs were allowed on the trail. We left Phoebe in the truck since it was crowded, but the three border collies came along with us. I even got Ezri to scramble up the ladder to the biggest lookout platform with me!

They were less than impressed as they waited for all six of us to take a group picture on another lookout.

We took a whale watching trip out of Port Townsend which had a lunchtime layover in Friday Harbor, both places we had never been. Unfortunately we did not see any whales, as all three local pods were hanging out closer to Canada that day, but we really enjoyed the boat ride and our lunch at a great restaurant. I'd like to go back to Friday Harbor with more time to walk around and explore, as our short two hour layover wasn't long enough to do much.

Harbor seals out sunning themselves, including a few baby seal pups!

Bald eagle hanging out on driftwood and looking for his own lunch. I took this photo with the biggest zoom my little camera could manage, and I'm pretty pleased with it!

On the Fourth of July we drove to the top of Hurricane Ridge and did a hike along the main hiking trail at the top. It was much improved from our motorcycle visit on Memorial Day, when we couldn't even get out of the main parking lot due to snow, but the highest parking lot was still snowed in and some of our hike was on packed snow. That's quite late for even the Olympic peninsula! The views were absolutely stunning, as shown above, and we had a very good time walking around and looking at all the different alpine plants and rock structures.

Our last outing was to the Sol Duc Hot Springs, including a hike just a few miles from the resort up to a gorgeous waterfall. The hike out to the waterfall was covered with these amazing little ground cover plants, which are related to the dogwood tree and look just like little tiny dogwood branches. The hot springs were very nice and I highly recommend a visit there - the hottest one, straight out of the spring, was at about 106F - heaven on a chilly 65F day!

Tiny waterfall on our way up to the bigger waterfall. Very picturesque with the moss and the cascading water.

The main waterfall, framed between a split tree truck. I am very proud of this picture and the composition that I achieved with the tree.

It was cool for summer but brilliantly sunny, with sunlight peeking down through the trees throughout our hike. Again, I'm pretty proud of my composition in this shot and pleased that the sun flare worked out so well!

We really enjoyed our trip, and I'd like to go out to the peninsula again at some point. The only thing I found to complain about was the restrictions on dogs in national parks, which includes most of the parks and hikes on the Olympic peninsula. I understand why the restrictions are in place, but I also wish there was a way to take a "Responsible Dog Hiker" test so that my dogs could hike along with me and enjoy the days that we did.

On to our next adventure - PAX!! Just three weeks away now!

Wednesday, July 13, 2011

my first quilt shop hop

About two months ago, I discovered the existence of something called a "quilt shop hop," and it turns out there is one in western Washington each June. The point of the event is to raise awareness/interest in supporting local quilt shops, by encouraging quilters and sewers to visit many of them during a specific weekend. The shop hop organizers (at least here in Washington) work with local fabric designers to make a set of fabrics just for shop hop, then each participating quilt shop uses those fabrics (along with one of their choice, if desired) to design a quilt block. Each shop then creates small kits including the shop hop fabric and instructions needed to complete their block, which are given away for free to each shop hop patron who visits their store. Many stores also make "finishing kits" using their chosen fabric and any embellishments, and sell those for $1 to $4 apiece. Furthermore, there is a paper passport that each quilt shop hop participant gets stamped at each shop that they visit, and once they have obtained a certain number of stamps, they can turn it in for a chance in a raffle with some serious prizes (this year included two high-end sewing machines, several goody boxes, and lots of gift certificates).

The shop hop runs from Wednesday through Sunday, and I decided to give it a shot and see how many of the shops I could visit during that time. Of the 54 participating shops (one of the original 55 closed before shop hop began), most are along the I-5 corridor between Vancouver WA (near Portland OR) and Bellingham (up near the Canadian border), a highway stretch of over 250 miles. There are even more out on the Olympic peninsula and on the various islands, but I put those out of the running since I only had one full day and couldn't spend time on the ferries. Thus I focused on the general Seattle metro area, and managed to visit a total of 18 shops between Wednesday and Saturday, with 11 of them visited during a marathon day off on Friday between 9am and 3pm. I went on Wednesday at lunch to visit the two shops closest to work with my best friend and another coworker, hit the shop near my house on Thursday after work, and had extra time appear on Saturday so hit two shops up north that morning plus one near the airport that evening. Friday I began in Lakewood and ended in Arlington, with a total driving distance of about 250 miles! All of the shop hop block kits and finishing kits that I picked up are shown in the picture to the left...there are a lot of them! It was a very long day, but I had a lot of fun.

Many of the shops had additional fun things going on, with several offering bottles of water or pieces of fruit, others offering special bundles of items or "pick a prize" drawings, and plenty with raffles hosted by the shop or a local quilt guild. I'm all about supporting quilt guilds and other worthy causes, especially for just $1 a ticket, so I bought a raffle ticket for everything that I came across - quite a few tickets, as you can see! Most are for quilts, but one is a drawing for two Featherweight sewing machines instead of a quilt. Yes, I need another sewing machine like I need a hole in the head, but for $1 who can pass that up? This is one of several reasons why it's a good idea to take a lot of one dollar bills with you on quilt shop hop, even if it made me feel a little odd to be asking for $30 in $1's at the bank on Thursday afternoon. Now I just need to organize my tickets so I can keep an eye out when the dates for the drawings come around - I left my email and phone number with all ticket stubs, of course, but best to have an idea of what gets drawn when just in case.

And of course, I visited 18 quilt shops...so there were purchases. Just a few, nothing too crazy, although a small purchase at nearly every quilt shop does add up quickly! I wanted to support the shops for participating in this event (which was a lot of fun for me), so I tried to buy something at nearly every one. I saved up a few essentials that I needed on purpose to buy at some shops, and then of course found quite a bit of fabric here and there that needed to come home with me! My total haul is in the photo below...

Lots of fabric, including a roll of 3 yards of rock/stone pattern flannel (on clearance!) and a half-yard of laminated fabric for making a new bag. Everything else is fat quarters, 1/2 yard, or 1 yard cuts of things that caught my eye. I also picked up more basting pins, some hand-sewing needles, a spool of teal thread for finishing my current quilt project, a shop hop pin, and a super cute little zippered bag that says "Shop Hop Queen" for keeping my hand-sewing items in when I travel.

There is also a neat handmade large wood button, which are sold at a quilt shop in Tacoma and which I just adored. I bought some green embroidery floss to use as the "thread" in the button and it will be hanging up in my quilt room shortly. This picture also shows some of the fun butterfly fat quarters I picked up, as well as another photo of the laminated raindrop fabric.

I also picked up one pattern book, and of course some lovely items from Shibori Dragon in Lakewood (my favorite stop at the Sewing Expo, and their shop is even better - I got a dragon to add to my collection!). At two different shops I picked up two different fabrics that have a long repeating print that is flowers with insects growing across the width of fabric - one in purple with lilies and one in blue with dragonflies - that I'm going to interweave to form a simple pattern that should be quite striking. All in all, I'm thrilled that I got to do shop hop this year, and hopefully next year I'll be able to do it again, this time with a friend!

And of course lest this post be solely about quilting, here's what I received at the tournament last weekend - the FMCh pin for Ezri, and the FGDCh50k pins for Phoebe and Jadzia. All three girls titled at the March 26/27 tournament, which is probably the only time that will happen in my life, and I am so proud of all of them and thrilled to have the pins to show for it.

I also got the 50k point plates to put on Jadzia and Phoebe's plaques, which will be done this week or this weekend. We have also been on vacation for the past two weeks (and then rolled right into a tournament in Oregon last weekend!), so I have a lot to share from that as well but will have to wait until I can get the photos off the camera. Sometimes it's much easier to make blog posts from iPhone photos...oh well!

Thursday, June 23, 2011

another sewing / creative post


May brought about not only Mother's Day, but also a birthday, and so I made items to celebrate both occasions. First up is a bag that I made for my mother, using the same pattern I've been using since last summer (this is the fifth bag I've made with it, I rather like it!). I picked out handpainted fabrics at the Sewing Expo in March, selecting a light purple with a silver sheen and swirly pattern as well as a shades of gray with silver and a raindrops pattern. Rather than just doing one side of each color, I used a strip of each one to slash the opposite fabric, and cut my pieces from those. There wasn't enough fabric left to make the outside handles, so I used a dark purple dupioni silk that I had on hand from a project a while back and that turned out really nicely. I was a bit nervous using the silk, but I didn't have any issues with fraying on the parts I was working on and it turned out really lovely, I think. The lining is a royal purple ballistic nylon, and inside (not shown) are two pockets made from a quilting cotton in a green/cream/gold butterfly print. I'm pretty happy with how this one turned out. Of course, I forgot to take pictures before shipping it, but my mom sent me these pictures she took, including this last one that shows the bag next to the quilt I made her two years ago (the first one I ever made!).

Next up was my best friend's birthday, and I decided to make her an iPad cover similar to the one I made myself a few months ago. I originally picked out the blue flowered fabric seen in the lining on the left, and then changed my plans based on a mutual purchase of the geometric/metallic fabric that makes up the center stripe. Shortly after we bought yardage of that fabric to split, I came across the green flowered fabric that fit with it perfectly, and so the design was set. I made the dimensions a half-inch smaller in width than mine, and it is a little snug on the iPad but seems to be breaking in well. Mine is really just a bit too big, so maybe the happy medium is a quarter inch in difference. The binding is a sage green leaf fabric that I used to bind the baby quilt I made for Finley last year - little projects like this are great to use some leftover binding for, saving me a lot of effort in cutting and ironing! I'm really happy with how this one came out, and even more pleased that I finished it with several days to go instead of finishing it just minutes before leaving for the celebration! Yay for me!

I've completed one other project which is enroute to its recipient, who reads this blog so I will wait to talk about it until she has received it. I am currently quilting a small baby quilt (meant to cover the baby-pod carrier thing) for a brand new baby another friend had, and again will wait to post more about that until it has gone to its recipient.

I read an awful lot of quilting blogs, and have been awaiting the release of the 1001 Peeps fabric by Lizzy House, which is an Arabian-themed followup to the Castle Peeps fabric she designed last year. The end of last summer is when I really began reading a lot of blogs, and at first I was irritated with how much of the fabric was showing up everywhere, but some of the design did grow on me - of course, too late to buy it in most retail locations! I did find some of the green castle print at the Sewing Expo, which I used to make my iPad case, and I bought some half-yard cuts of the blue colorway from a seller on Etsy earlier this spring. When the new 1001 Peeps fabric came out, including a gorgeous purple colorway, I bought quite a lot of it...mostly half-yard cuts, but some full and multiple yard cuts as well! I was super thrilled when it arrived, and I've just about settled on my first project with it - a sleeve case for my Nintendo DS, rather than the large snap-on case that I currently use. I'll post about that when I work on it next month, never fear - I want to have it in time for PAX!

Speaking of PAX, both Chris and I are planning to take part in the Buttoneer exchange this year, which is where all participants make up their own buttons and bring them to trade. I took part in it last year and had a great time, so it was a no-brainer for me to do it again this year and Chris doesn't want to be left out. I can come up with great designs in my head, but I'm not so good at the art of drawing them up myself, so instead I chose two photos of Curzon and Ezri from our photoshoot last fall and with the permission of Artis Photography I made PAX buttons from them. I can't wait to trade them in August!

We're about to head out on vacation, as our friends are coming from NJ with their two kids and we're taking the RV out to the Olympic Peninsula for a week and a half. It's going to be a lot of fun, even if the weather is not being so cooperative, and we're really looking forward to it.

Thursday, June 2, 2011

Memorial Day ride

On Monday, for the first time in about two years, I went on a motorcycle ride for fun. This time around was much better than the first time, mainly because of the bar risers that make it so much easier to ride my bike for long periods of time. It was also more fun since there were friends of my own on the ride, rather than just my husbands' coworkers, as two people I've known for a long time via an online message board came along for the trip.


We took the ferry from Edmonds to Kingston, then met up with the last person in Poulsbo before heading out 104 to 101 towards Port Angeles. This was the first time I've gone out that way, including going over the Hood Canal Bridge, and that is very impressive - and I'm very glad there was almost no wind that day! We rode up to the top of Hurricane Ridge, which surprised us with temperatures of 34F and more than five feet of snow still on the ground, as shown in the above photo. The road was a LOT of fun to ride, despite the cold, wet, and fog, and I'd like to give it another shot some time when I'm not holding back due to weather conditions. I was definitely the most comfortable of our group in my electric heated gear, however!


On our way back, we stopped on 101 in Port Townsend to visit Fat Smitty's, a burger joint recommended to us by another friend on the forum who wasn't able to join us. We parked our fleet of bikes - my BMW F800ST, my husband's Honda ST1300, a KLR, a V-Strom 1000, and two others I don't recall - outside of the joint and went inside. It's definitely a dive diner, with hundreds of dollar bills with sharpied drawings/comments thumbtacked all over the place, but it was a great stop after a lot of riding.


And that is their signature dish - the Fat Smitty burger, with three buns, two patties, cheese, bacon, and veggies. The advice the server gave was "to squish it as flat as you can, pick it up, and DO NOT LET GO" which was ignored with entertaining consequences by at least two people in the group. I did not get one of these, as I know better, and my regular sized burger and chocolate shake were perfectly tasty on their own.

Taking a motorcycle on the ferry is awesome, as you can skip the 1-2 hour wait that the cars are suffering through and go straight to the head of the line. There were about fifteen bikes waiting for this ferry, including our group pictured above (with another big BMW from another passenger) and a group of Harleys that was on the other side. The ferry was pretty crowded so we just stayed down below with our bikes for the ride over, especially since it's only about a half-hour once the ferry is loaded and moving.

We did a total of about 200 miles or so, and I really enjoyed the trip. I'm thinking another trip should be in the cards for this summer, maybe a visit to Mt. St. Helens, especially since we can't take the dogs there. We'll see!


Friday, May 27, 2011

the trouble with terriers...

...is that they don't know when to quit. We've had issues with Phoebe picking fights with the female border collies in the past, as already chronicled, but there's never been a serious injury. Neither Ezri nor Jadzia have ever been hurt by Phoebe (I'm not sure she CAN hurt anyone, with her ground-down teeth...), and when Jadzia has corrected Phoebe it's ended with a small puncture wound or two. It has been quiet in our house since early November, with very few snarls and no actual fighting. What a pleasant change.

Too bad it didn't last.

On May 9th, Phoebe got herself into a big bowl of trouble yet again, this time requiring an emergency vet visit. Chris had come home early before I did, and put the dogs (plus Jitter, our friends' BC puppy we were watching) loose into the house so he could clean out the kennel. When I came home and went upstairs, I found Phoebe with this wound in her side. As near as I can figure, Jadzia or Ezri got excited and bouncy when I came home (they can hear the bike a block away), Phoebe tried to fun police them, and Jadzia nailed her in the side. However, this time it wasn't a simple puncture wound - instead it looked like her tooth caught in the skin and ripped it for a good couple of inches. Yay. So it was off to the emergency vet for me and Phoebe to get that taken care of, since that's a little too severe to pack with neosporin and hope for the best.

Unfortunately the e-vet was pretty busy that evening, so while they were able to give Phoebe some pain meds right away they weren't able to get to treating her injury until well into the night, so she had to stay the night. She got several stitches along with a drain, with the drain staying in place for five days while we used hot compresses on it twice a day to help promote healing. Additionally she got a course of antibiotics, as well as pain meds, topped off with a cone to keep her from chewing the wound, all to the tune of "too much money" for such an idiotic move. So she's been crated during the day for over two weeks now, obviously with no flyball or other heavy exercise allowed. To add insult to injury, it's been raining a lot and so when we took her out for the first week or so we had to put a coat on her to keep the incision dry. Phoebe was totally thrilled about THAT, believe me.

Happily all seems to be healing up as needed now, which is good since she's a height dog for the tournament next weekend (June 4-5). The drain came out on May 13, and one of my vet tech teammates took her stitches out on May 22. Of course, silly me thought that once the stitches were out she didn't need her cone and put her in the crate without it, so she chewed it up a bit that day. It healed up quickly, and we are now allowing her supervised no-cone time and for the past three days she's shown no inclination to go after the spot. I hope that keeps up, I don't want to deal with a cone at the tournament! It's going to be bad enough explaining what happened to her all weekend long - she's already running in the yard full-bore to play fetch, so I'm not concerned about her ability to run flyball next weekend at all. Phoebe continues to live up to her nickname as "the little tank," although I wish the continuing proofs were a little less expensive!

In positive Phoebe news, she is now ranked 38th of a total of 1460 Jack/Parson Russell Terriers on the NAFA point-scoring list. She's also currently at 118 on the top 250 point-scoring dogs for the 2011 racing year. Not bad for such a little brat.

Thursday, May 26, 2011

urban homesteading and you

This is my first attempt at a quiche/frittata type of dish, and I'm pretty pleased with how it turned out. I got the recipe from an awesome book I picked up a few weeks ago, The Urban Homestead, which is full of fascinating information about skills that are largely unknown in American city society. The book covers topics from cleaning (vinegar and baking soda) to growing food (from microgreens in the window to full-on food gardens) to keeping worms and chickens. It also covers various food preservation methods, including canning, making butter, drying, and so on. While I'm passingly familiar with many of the concepts, I'm not at all familiar with how they are executed and it is really neat to have a book that explains all of this sort of thing to my citified self. And possibly even more importantly, the book is written with enthusiasm but not with disdain, as so many "eco-friendly" books often are, so I came away from reading it excited and inspired to try new things and not dejected and morose that I'll never be cool enough or eco-friendly enough to be acceptable. The recipe for this "crustless quiche" came from the book, and I modified it slightly to make it gluten-free so that Chris could enjoy it as well.

Recipe: Crustless Quiche (from The Urban Homestead, modified to be Gluten-Free by me)
Ingredients:
4 eggs
~1 cup of soft cheese
1 cup of milk
3/4 cup of gluten-free flour
1 tsp of salt (or more to taste)
ground pepper (to taste)
additives (bacon, ham, onions, garlic, spinach, etc.)

1. Preheat oven to 350F. Grease a 9" pie pan, and put the pie pan on top of another pan or cookie sheet in case of spills.
2. Prepare any additives that need it, such as sauteeing garlic/onions/spinach in olive oil, cooking bacon and crumbling it, chopping up ham, etc. All mix-in items should be diced, chopped, or crumbled to be small, like 1/4" - 1/2" with smaller pieces better. Also cut up the cheese at this point and set it aside - again, 1/2" cubes is a good plan.
3. Mix flour, salt, and pepper together. If you want to add any additional seasonings, this is the time to do it.
3. Beat the eggs together in a largeish bowl. Add in the milk and mix thoroughly.
4. Add the flour a bit at a time, mixing well with each addition, until all of it is incorporated and you have something that looks kinda like pancake batter. Gluten-free flour is particularly picky about being mixed in, so just do your best - mine still has some small blobs of unmixed flour even after several minutes of beating.
5. Add in the cheese cubes and stir, then add in the rest of your additives.
6. Mix everything well and pour into your pie pan, possibly giving it a bit of a stir to redistribute the additives after pouring. Top with extra grated cheese if you like.
7. Pop into the oven for 45 minutes. The quiche is done when a knife stuck in the middle comes out clean.

The flour in the mixture, at least with my gluten-free version, will settle a little bit during baking and make its own sort of psuedo-crust in the pan. You can kind of see this in the photo to the right. I've made this recipe twice so far, and the important attributes seem to be the size and amount of additives, and the type of cheese used. My first one was made with queso fresco from the farmers' market, which is a slightly squishy and low density cheese, and it came out much better than the second one which I made with fresh mozzarella which I think was both too dense and too damp for the dish. The original recipe suggested feta, and I'm thinking of trying cheese curds as well. Shredded cheese would probably be great as well, but I did really like the taste and texture I got when using the queso fresco. The second version I made I used sliced ham that I cut into about 3/4" squares, and they were too big and didn't stay well distributed in the pan, though that might be because I also used a lot of ham. The second one was still edible and pretty good, even with the damp cheese and too much ham, so this is a pretty forgiving recipe over all. And it's pretty quick to put together, especially if you pre-chop everything in advance. The one recipe gave enough for two meals for the two of us, and it reheats nicely - I just foil-wrapped the pan, and then popped it into the oven at 250F for about twenty minutes the next evening.

I also have a funny Jadzia story to share today. I've realized this week that she has figured out how to tell me the water dish is empty - she waits until I'm filling my own water bottle at the fridge, and pats my leg. Every time she's done this in the past two weeks, her water dish has been empty. That's pretty good problem-solving, even for a border collie - she connected the water from the sink, the water from the fridge, her bowl, and my bottle together. I'm very entertained and kind of proud of her for that.

Saturday, May 14, 2011

sewing room remodel, finished!

Posting more often doesn't seem to be working out the way I intended. Oh well. At least I finally found the charging cables for my cameras, so I was able to get the pictures off of them from finishing up my sewing room remodel. I've been happily working in it for about two months now, so this post is well overdue.

First a single photo of what the room looked like before we began. Plain white walls and blue carpet, same as the living room and hallway in our house. The room is rather small, only 8' x 7.5', and I originally just had a single 8' conference table for both my sewing machine and cutting area. This meant that it wasn't really comfortable to do either, and was really my biggest driver for doing the remodel.


The first thing we did was rip out all of the old carpet, as shown in a post in February. Once that was done we painted the walls - two in a tan and two in a light sage, with the half-wall molding done in a dark green - and installed laminate flooring from IKEA in "dark brown" with floor molding to go along with it.


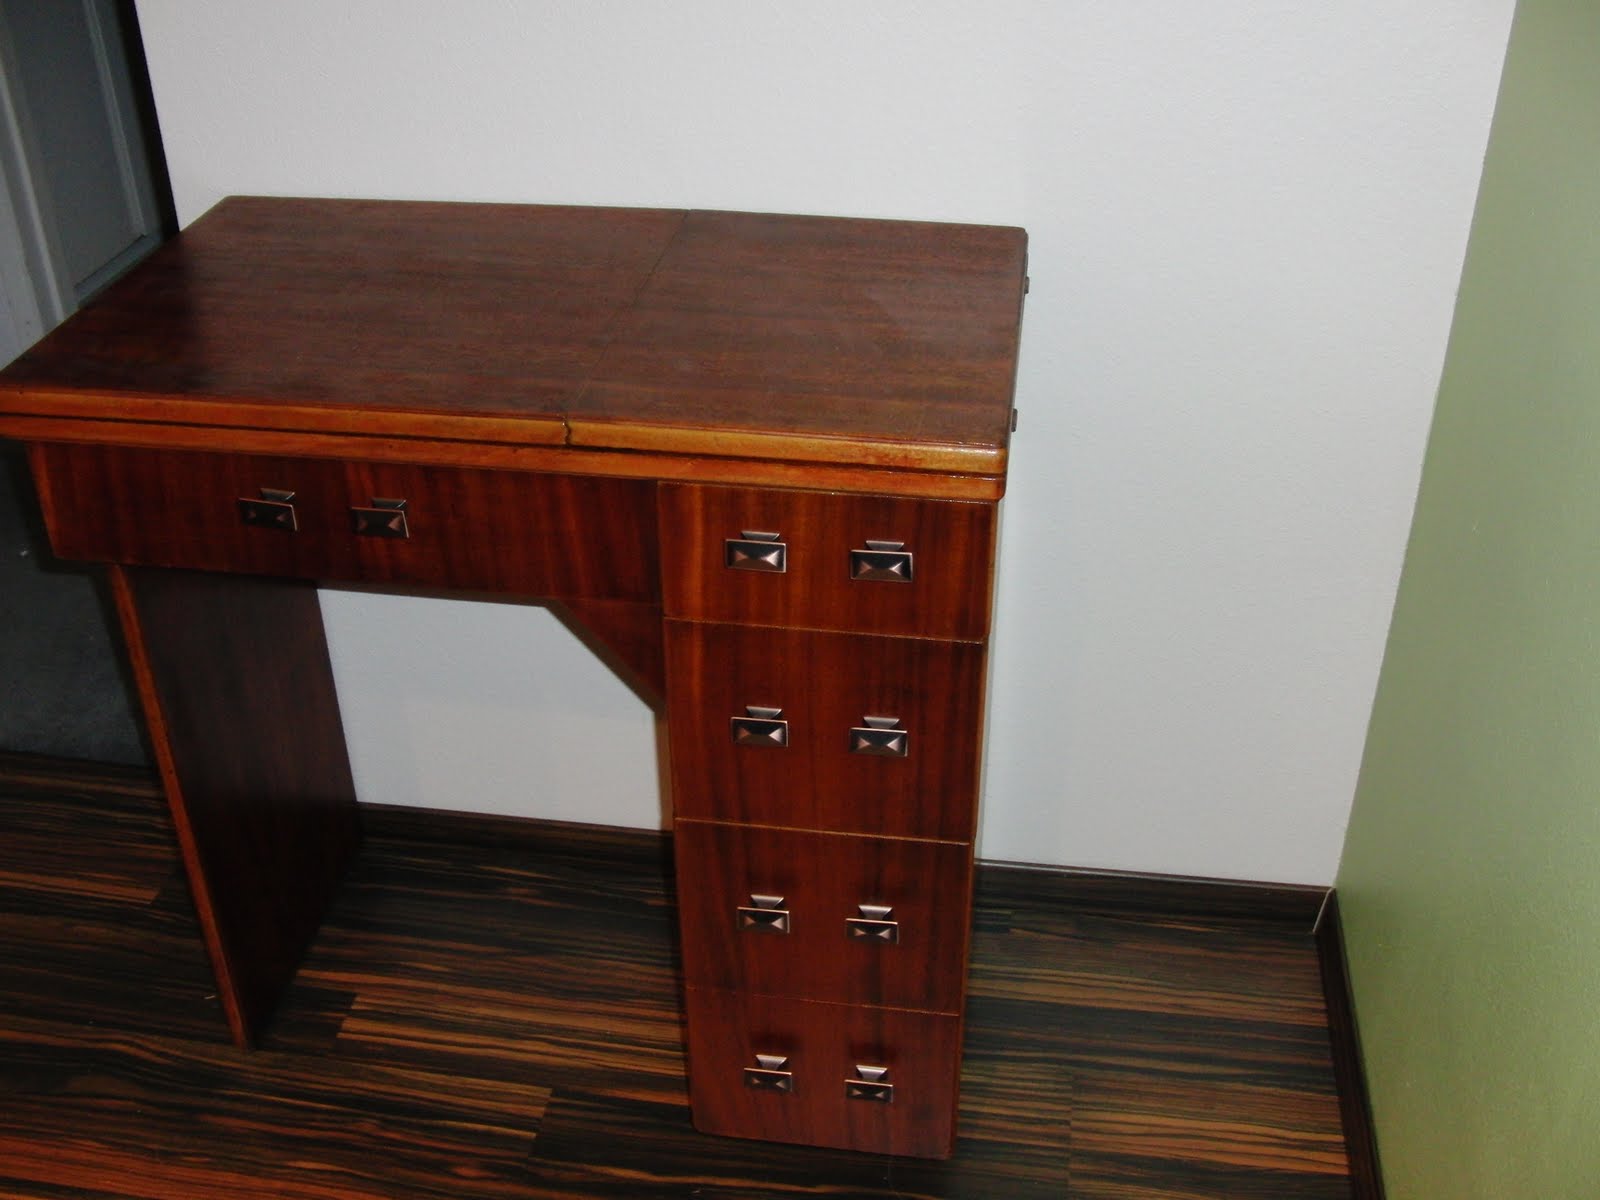
Once that was done, we started moving the furniture back in. Here's the back corner of the room, to the left as you look in the door, showing the cabinet I refinished last year that contains my Pfaff 130 machine.


Next up is my barrister's cabinet, which was given to me by my Nana many years ago when I was still living in Pittsburgh, which holds my fabric stash and some of my other sewing machines. I used fabric and foam board to make panel covers to fill in the glass, which eliminates the visual clutter of the cabinet when the doors are closed. I still need to make a panel for the lower door, unfortunately!


The newest feature of the room was a design wall, where I can put up pieces I'm working on in order to set their design before I sew them together. I made three panels using styrofoam insulation panels from Home Depot, each 2' x 4', covered in batting which was then stapled to the back of the panel. I added picture frame hangers to the back of each panel using superglue to hold them in the styrofoam, then hung them up. They're light and easy to maneuver, and I'm really quite pleased with the result. The picture shows blocks from the Halloween table runner and the baby quilt I made for my friend Kathy, both projects which I'm glad to say I've finished since then!


The replacement for the conference table was two adjustable tables from IKEA, one of which was set up high to use as a cutting table and the other was set down low for my sewing machine. There are plenty of tutorials online and in books about ergonomics of both, but generally you cut material at standing height and want your sewing machine at seated height, so using one table for both really makes it hard for either one to work out. This photo also shows the awesome replacement for nails in the wall - a pegboard, painted dark green to match the half-wall molding trim, which holds my rulers, cutters, scissors, and other tools.


And now, for the photos of my sewing room as it is now with just about everything moved back in (as opposed to the minimalist, neat, and tidy photos above). Here is my sewing table, with the attached ironing board (which Chris cut down for me so it could be used on the low-height table), my bookshelf of sewing books, speakers for use with my iPad (TV or Pandora radio), thread rack, and bulletin board which has a crocheted Star Trek insignia potholder my mother made me, photos of my mom & me, Ezri, and Curzon, a color wheel, and Superior Threads sample cards.


Here's the cutting table photo, where you can see I've added more rulers and tools to the pegboard, and you can see my kaleidoscope quilt blocks on the design wall and my current project on the table. I've also picked up some cheap green and purple small vinyl bins at Target that I'm using for scrap and trash collection on the table - much easier than stepping around the ironing board to the trash can every cut! Beneath the cutting table are my two storage units, mostly for precut scraps and specialty fabrics, which will be joined by a third next time I have a coupon for JoAnn's. Behind the storage units are my wrapping paper supplies, as I figured that was a great place to put them since they're not needed often and my cutting table will be a great place to wrap gifts in the future.


This is another view of the Pfaff cabinet side of the room, also showing my beautiful Brian Froud print and another project that's on the design wall. The cabinet has the awesome Halloween table runner on top of it, but you can't see it right now because it's covered in other fabric acquisitions as well as the working fabric pile for the project on the design wall. To the right is the incredibly cool pirate chest that I got off Craigslist for $30, which is holding my project collections, precut jelly rolls, and unfinished quilt tops. Just ignore the pile of bags under the cabinet...


Above the Pfaff cabinet is the same shelf that was there before, which holds my childhood teddy bear, a unicorn beanie baby my husband gave me, and the beautiful pillow my mother cross-stitched for me for my thirteenth birthday. I'm so lucky to have inspiration from my family and friends in this room when I work.


Finally a view of the barrister's cabinet again, with the doors down to hide the clutter inside them. The clutter isn't actually that bad, since I got some great bins at the Container Store to hold everything (so far), but it's more calming visually to have the doors down. The decorative (but largely useless until I turn it into a hand crank) Singer NL-15 is on top of the cabinet, and my Featherweights, older Janome L-108, and my Rocketeer are inside the cabinet. Just to the left of the cabinet and behind me when I sew is a shower corner shelf kit in the right shade of green that I got for $7 on clearance at Target, which holds my smaller notions that I use often but didn't want right next to my machine. There's also a small whiteboard just to the left of my chair where I note what I'm working on and what's on the list for next.


So there it is - my finished sewing room! I love how it turned out and it makes me happy every time I go in there. There are some features not pictured, like a remote-control power strip for my sewing machine and iron, that I added along the way that are really awesome. I also have a few other things I'd like to hang up in there, like my bridesmaids bouquet from a few years ago that's framed in brown and would look great, and some embroidery hoops that I got to display favorite fabric swatches. Those will get put up eventually...unless we move first!